Getting Attached to Video
November 10th, 2009One of the areas I’ve been refining in this last round of work on MemoryMiner 2.0 is the way that video is displayed in the attachment viewer. Most consumer point-and-shoot cameras take video, so I often shoot short videos that don’t need editing and attach them to photos. One of my favorites is of my son sending a bowl of oatmeal off the edge of his high chair when he was a toddler.
At any rate, the video I had shot was 640 X 480 pixels, and thus when viewed in the MemoryMiner 1.x attachment viewer (which uses a WebView to display all attachments) would have scrollers:
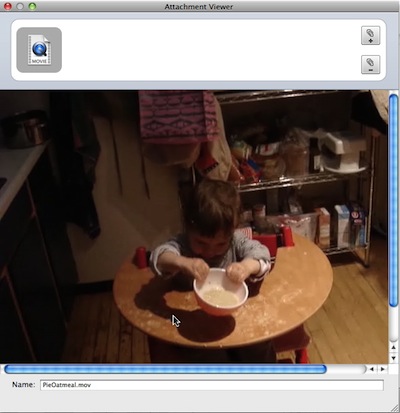
In order to see the playback controls you’d have to scroll. Ugly.
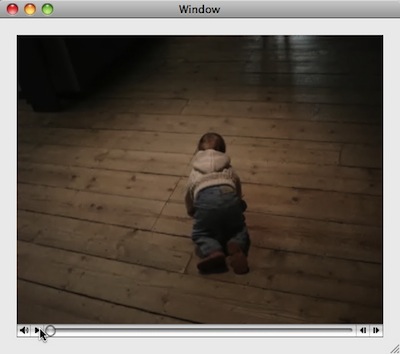
In 2.0 I wanted to fix this, so at first I thought I’d use a QTMovieView, thinking I could have better control over sizing and scaling. This turned out to be a bad solution for two reasons. First is that the video is scaled up in size as the view is resized: chunky ugly video sucks. Secondly, the playback controls aren’t nearly as slick looking as in the QuickTime web browser plugin. Have a look here:
Since I was already using a WebView to display all attachments (because I’m lazy, and for the most part the WebView does a spectacular job of doing the right thing) I thought maybe I could make the HTML to display the video smarter. After some help from Schmichael Padullah (name changed to protect the guilty) I learned about the magic of the max-width/max-height CSS attribute. I created this HTML test:
<html>
<body style=”background-color: rgb(38,38,38);”>
<video controls=”" autoplay=”"
style=”margin: auto; position: absolute; top: 0; right: 0; bottom: 0; left: 0;
max-width:90%; max-height:90%;” name=”media” src=”file:///Users/johnfox/Movies/PieOatmeal.mov”>
</body>
</html>
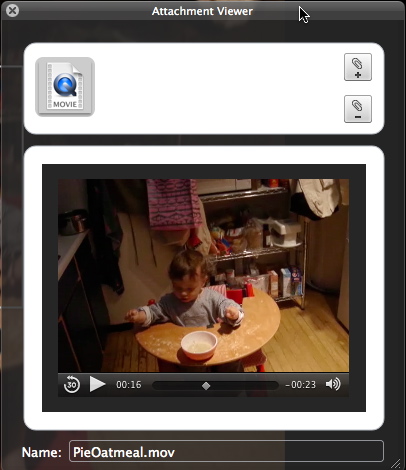
Works like a champ! So now, for video attachments I programmatically create an HTML string using NSString stringWithFormat so I can set the max-width, max-height and src values then load that into the WebView. The result?